Have you ever dreamed of shooting a basketball like Curry? Well, humans are excellent imitators, meaning your hopes of shooting hoops like the pro-athlete is achievable (with regular practice).
We spent several hours watching Stephen Curry shoot to ensure we created a concise and helpful guide. Read on to learn Steph Curry’s shooting form.
Step By Step Guide of Steph Curry Shooting Form
The highest 3-pointer is shot by Ray Allen, who shot 2,973 in his 18-years NBA career. Nevertheless, so far, Steph has completed 2,940 3-pointers in his career. At this rate, Curry might break this record at the end of 2021. (Update: Curry broke it.)
We created this guide to have three sections. Each phase is packed with actionable steps underneath. Here are the phases:
- The Build-Up
- Shooting Sequence
- The Follow Up
Let’s have an in-depth look at these steps.
Phase 1. The Build-Up
The amount of time you spend building up to shoot will determine whether you hit it or miss it.
However, the build is usually different, depending on the situation. For instance, your preparation for a release while dribbling and when you’re standing still cannot be the same.
Not worry; we will show you how Steph builds up in both scenarios. However, we recommend beginning with standstill shots.
Step 1. The Posture
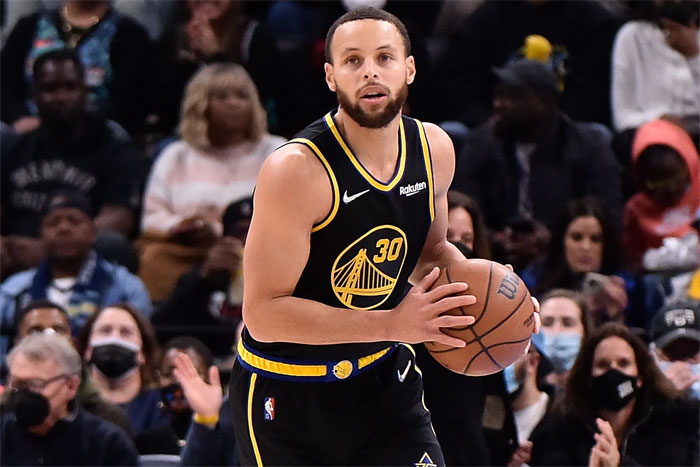
Steph usually has his hands prepared to catch the ball around his waist level if he is standing still.
Next, he bends his legs and is ready to create the required force for the perfect shot. Legs produce the needed momentum for a release while our hands direct the ball on the right path.
Once he has the ball, he can use this loaded posture to reduce the amount of motion required to release the ball. In other terms, it speeds up his release. Most players are taught this posture during training.

When shooting, guards typically keep their posture narrow for a quick release. But Curry’s stance is usually wider than usual. When he goes for the dip, he adjusts his posture due to his knees drawn inwards.
Curry’s form differs from an ideal technique in several ways: his inward knee bend. We don’t encourage imitating it because it isn’t suitable for most individuals and will cause you to slow down.
He can release the ball without changing his position when he dribbles because he is already low. He simply tosses the ball at his shooting range.
It’s worth noting that he tends to use his off-hand to shoot the ball toward his preferred range. This allows his shooting hand to go straight into the shot motion, eliminating any unnecessary movement affecting his accuracy.
Step 2. Make a Turn
Steph and other professional basketball players place their feet apart but twist them slightly. Additionally, the foot on the shooting hand’s side is positioned before the other.
Curry shoots with his right foot in front, bit to the left side of the net’s edge because he is a right-handed shooter. If you shoot with your left, then you’d do the exact opposite.
Consider the 11 o’clock and 1 o’clock positions. Now, Curry can position himself to the edge and finish his shooting sequence without feeling tense.
When he’s dribbling or running around an area, things change. In these scenarios, he’ll line up to the net to stop his momentum. Then he executes a spin when he lifts.
As a result, he places himself in the proper position, but it’s a highly complex method.
Step 3. Align
Curry immediately places the ball in his shooting range after catching it. He positions his hand beside the ball, a few inches above the ball’s horizontal center, and secures the ball with both hands.
The location of his hand will shift a little later, but it is necessary to have an accurate alignment to assume this position. His index and thumb make the alphabet ‘V,’ and his fingers are spaced out. There is no strain in the hand because it is nearly rested.
For proper alignment, he keeps the elbow of his shooting hand near his side, and he starts the shooting action by holding the ball slightly ahead of his body’s midline.
Curry can maintain a perfect shooting sequence the entire time because of the distance and ball position. He places his non-shooting hand on the other end of the basketball, adjacent to the release hand.
Step 4. Target
After aligning himself properly, Steph aims as he secures the ball in his hands. He does this to release the ball swiftly. But we all know aiming is a bit tricky.
Interestingly, Curry makes the process easier for himself by going for the rim point nearest to him, the point where the edge meets the net.
This step concludes the build-up phase. Let’s move on to the next.
Phase 2. The Shooting Sequence
After the catch, you should be able to tell Curry’s next move.
With the ball safe within his shooting pocket, Steph keeps the ball in complete contact with both hands. He twists his feet slightly as he places the left foot behind the right one. Then, his feet are locked into the position on the net’s edge.
Finally, his shooting sequence begins!
Step 1. The Dip and Raise
Before shooting the basketball, Steph dips the ball to develop a rhythm for his shot. In other words, he lowers the ball to his waist before moving it up for release.
While most players’ dips are more prolonged, Curry denies lowering the basketball at all. But from our analysis, we noticed he shoots straight from a dribble. However, he drops the ball when standing still.
You can get a quick shot with a quick dip. If Curry ever slowed down his plunge, he would lose his ability to create momentum. Additionally, he bends his knees slightly as the ball lowers to create more energy.
After the short dip, he takes the ball up to the baseline along the midsection of his body. He begins moving the ball up while extending his legs to ensure a seamless energy transfer.

Curry moves his release hand to the back of the basketball as it comes up, allowing him to get to his baseline while maintaining alignment with the rim. The ball’s path would look like the alphabet ‘S’ if you looked at it from his right side.
Step 2. Curry’s SetPoint
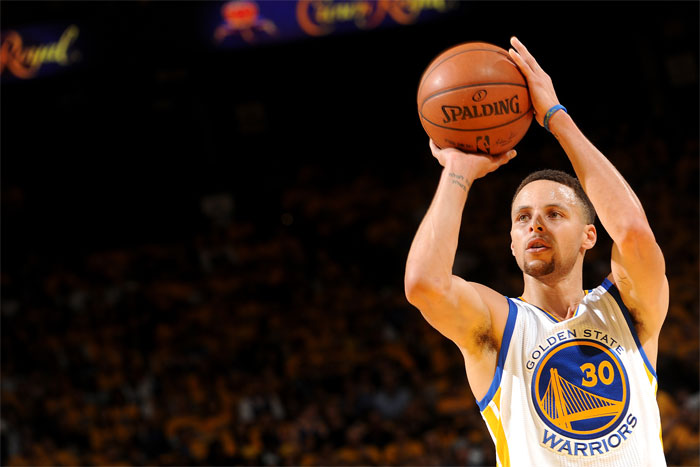
When Curry shoots, he takes the ball back toward his head before traveling straight towards the net.
The setpoint is when the ball begins to move towards the net. Steph’s set point is slightly over the right eye. His thumb is aligned with his eyebrows, and his palms are facing to the side at this point.
You’ll also observe that his hand creates an angle of 90-degrees with his armpit. His arm and forearm make a much smaller angle than 90 degrees.
Curry always finds his set point before he lifts from the ground, then he propels the ball forward with the force of his jump.
Step 3. The Release
Steph usually shoots from his palm. Curry balances the ball on his entire hand, with the ball’s weight resting on his palm. When he snaps his wrist forward, the ball is transferred from his palms to his finger pads and subsequently off his fingers.
Curry’s shot is rapid, and his jump is low. A higher bounce would squander energy and into two motions which would disrupt his rhythm.
Consistency is another advantage of a low jump. Curry can easily recreate his technique late in the match because his jump doesn’t require a lot of power. When fatigue enters the picture, this is huge.
Timing is another way Curry keeps his form consistent. His wrist snaps at the same time that his elbow straightens out completely. It’s not simple to perfect this timing, but it’s an essential aspect of being a consistent shooter.
You might also like: Why is Stephen Curry Famous?
Phase 3. The Follow Up
It doesn’t end with the release, and Curry understands this fact. An inconsistent follow-up often reduces shooting accuracy. Let’s see how Curry does it.
Step 1. Off-hands
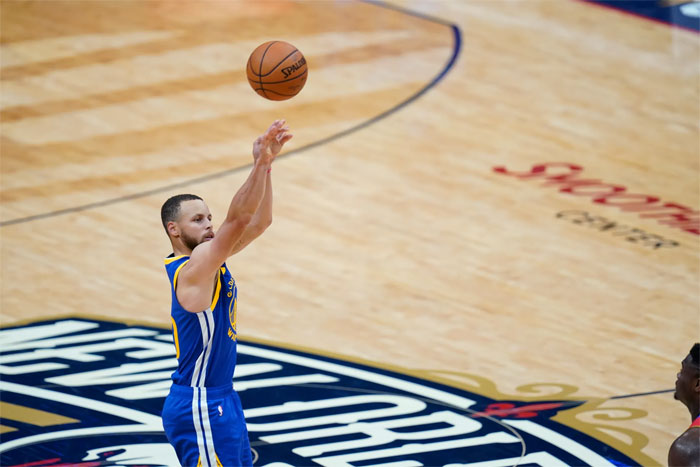
After the release, Curry maintains his arms straight and his elbow in line with his brow. Even with the low setpoint, he still achieves a perfect arc with this technique.
Curry’s arm is straight but not rigid, as you have probably seen before in one or more of his many games. His wrist is slightly flexed but otherwise unconcerned. He uses this to assure accuracy without tiring his shooting arm, and it’s something you should learn.

Step 2. The Eyes
His gaze remains fixed on the basket until he is released. Curry’s eyes follow the ball’s flight once it is airborne while tilting his head slightly backward.
We believe he does this to assess his shot. Great shooters, such as Steph, use the knowledge gained by seeing the basketball to weigh their technique for that shot. This allows players to recognize if they made a mistake right away, and they’ll be more mindful of it during subsequent shots.
Related: Top 3 Stephen Curry's Signature Moves
Your Turn: Steph Curry Shooting Form
Every player’s shooting style is unique, and they are all built differently. However, they develop their basic shooting technique to suit their bodies. Our height, finger length, wingspan, explosiveness, and hand size often influence shooting techniques.
That’s why it’s virtually never a good idea to try to imitate another player’s form motion for motion. Thus, you must develop your shoot technique based on your features.
Nonetheless, you can still learn a thing or two from Curry to help you perfect your method. Also, remember that Rome wasn’t built in a day. So, you’d need to practice till you’ve got a firm grasp on your technique.
Here are some resources to help with your shooting form:
