Are you trying to improve your performance on the court?
As satisfying as the swish of sinking a basketball into the net is, every player should also work on their bank shot. But to execute this power move, you'll need a functional backboard.
If your hoop has a damaged backboard that makes practicing bank shots impossible, you don't have to replace the entire structure. Instead, you can learn how to replace a basketball board in a few easy steps.
Below, we'll give you step-by-step instructions on how to replace a basketball board so that you can get back on the court with confidence.
Causes of a Damaged Basketball Board
Your basketball board can last for anywhere between six months and five years depending on:
- How often you use it
- Where you store it
- The quality of the materials
But no matter what, basketball boards aren't meant to last forever. They'll become worn over time due to:
- Sun exposure
- Constant pressure from taking shots
- Inclement weather
A broken basketball board may develop slowly. At first, it may start to peel or crack in small areas. Then, it may shatter all at once, leaving you with a DIY project on your hands.
Portable basketball hoops are especially susceptible to having backboard problems. Manufacturers make these portable products using cheap, low-quality materials. This kind of construction makes it easy to transfer the hoop, but it shortens the product's lifespan.
So, you should expect to replace the backboard at some point.

Because damaged backboards are common in portable hoops, we'll focus on how to replace a basketball board for portable hoops.
However, you can apply the same techniques for roof-mounted or in-ground hoops. The only caveat — you can't lay the frame down to work on it.
Before You Start — Safety Tips for Replacing a Basketball Board
When it comes to explaining how to replace a basketball board, the steps are pretty simple. However, you should abide by a crucial safety tip: do NOT make the new backboard significantly heavier than the original one.
A heavy backboard is likely to cause the entire structure to tip over. It may tip over in the middle of construction or while you're deep into an intense game.
Some DIYers who install a heavy backboard “solve” the problem by weighing down the base with cinder blocks or sandbags. While you should always stabilize the base, you shouldn't use it as an excuse to go with a heavy backboard.
Play it safe by installing a lightweight backboard.
How to Replace a Basketball Board — What You'll Need
Replacing a basketball board isn't rocket science. However, you will need to dedicate a few hours to complete the task. For those DIYers who like to take their time, a two- or three-day period should suffice.
This kind of project also isn't for those who like to fly solo. You'll need at least one helper — and no, this person can't be your five-year-old son. Your helper should be someone who's comfortable with some light lifting.

While you'll need at least one person to help you lift, you can recruit the rest of the family for the more creative aspects of how to replace a basketball board. More on that later.
In addition to some time and a helper(s), you'll need the following materials:
- Backboard material (some type of strong board type material, including ¼ plywood or acrylic)
- Construction adhesive
- A socket set
- A drill bit
- A power drill
- A putty knife
- Screwdrivers
Some optional materials include masking tape and wood screws. Wood screws will come in handy if you're using plywood, and you can use the masking tape to paint lines on the final product.
Step-by-Step Instructions — How to Replace a Basketball Backboard
Now that you know what you'll need, you can start the process.
Below, we've outlined 12 steps on how to replace a basketball backboard.
Keep in mind that there are various types of basketball hoops, so you may have to adjust these steps slightly to fit your current hoop. However, our guide should lead you in the right direction.
1) Set up the basketball goal properly.
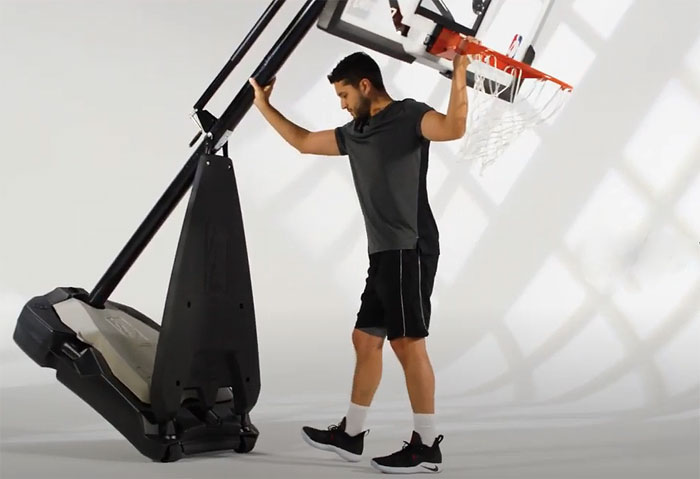
You shouldn't attempt to work on the basketball goal when it's standing upright. You would need a ladder, which can be cumbersome and risky to use. Plus, the process wouldn't be as effective.
Instead, lay the basketball goal down on its side. Enlist your helper to help you lay it on the ground, either in the grass or on a sidewalk.

2) Acquire your backboard material.
Don't pick out any sized piece of material for your backboard. Consider what makes sense for your current setup.
If you want to create a regulation backboard, make sure your current hoop structure can support it. If not, you'll have to go smaller.
You may acquire your new board via one of a couple of ways. The most hands-off approach is to visit your local hardware store and purchase a piece of clear acrylic or plywood. Have one of the employees cut it for you to your precise measurements.
If you want to take matters into your own hands, you may use a power saw to cut leftover materials you have from past projects.
Note: If you choose plywood, do not pick a piece that's thicker than one-fourth of an inch. If you use a thicker piece of material, the final product may topple over.
3) Paint your backboard material.
Having a plain piece of wood or acrylic for your backboard is boring.
Feel free to get creative with it. Enlist your kids to personalize the backboard with fun colors and designs. If you want to make it more simple, add a border and a square above the rim area to serve as a target.
4) Take the rim off.
Give yourself more room to work by removing the rim from the old frame.
Use your socket set to remove the bolts holding it in place. Set the rim and bolts aside to use later.
5) Remove the old backboard.
Most backboards attach to the frame via screws and glue. Remove the screws using your power drill or screwdriver.
The glue may be a bit trickier to take off, so you'll have to chip away at it with your putty knife.
6) Drill holes to set up the rim.
Use pieces from your original backboard as a stencil to outline the location of the rims' holes.
Following your markings, use your drill to drill holes. Ensure the drill bit you use is the exact size of your mounting bolts.
7) Apply adhesive to the backboard frame.
Apply your adhesive to the backboard frame. Only spread the glue where the backboard will meet with the frame.
Choose the right adhesive based on your board material. For example, yellow wood glue works well on plywood.
8) Set the backboard and attach the rim.
It's time to work quickly before the adhesive dries. Ask your helpers to help you position the backboard in place. It should lie evenly on the frame. Ensure that the rim holes line up with the frame's holes.
At this point, you can also attach the rim. Secure the bolts in place and ensure you tighten them snugly.
Here's an in-depth guide on attaching a backboard to a pole.
9) Secure with screws.
You won't need to secure your panel with screws if you're using acrylic.
However, you'll need to use screws with plywood. Use your screwdriver or drill to insert the wood screws through the holes in your backboard frame.
Use short screws, so they don't cut through the panel's front side.
10) Allow the adhesive to dry.
Give your adhesive enough time to dry before moving onto the next step. It usually only takes about 30 minutes, but follow the instructions on your product's packaging to be safe.
11) Stand the hoop back up.
Pull out the guns again. It's time to position your hoop where you want and return it to the upright position.
Enlist your helpers, so you don't throw out your back.
12) Stabilize the base.
Stabilize your base using sandbags, cinder blocks, or anything else that's compact and dense. Proper stabilization will prevent your new creation from falling over in heavy winds and hurting someone.
Test the stability before you start playing. Give the hoop a good wobble and take some test shots, using caution in case the hoop topples.
Related: What Should You Fill a Basketball Hoop Base to Stabilize It?
Get to Playing!
After following these steps, you should have a functional backboard that's capable of handling force. Now, there's no excuse not to perfect your bank shot!
Your performance will no longer suffer due to a flimsy, unstable backboard, so recruit your friends for a pickup game or start working on your jump shots and free throws!
You might also like: 7 Easy Steps to Remove a Basketball Pole
