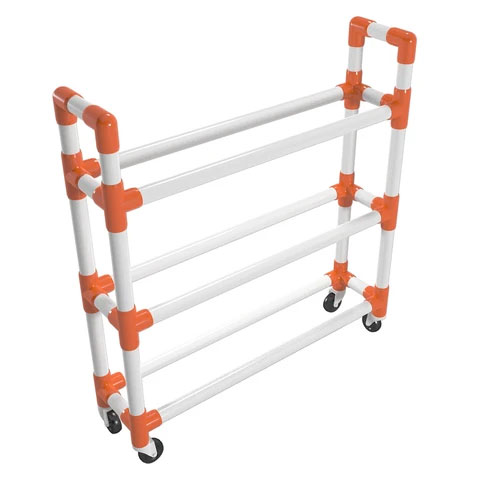
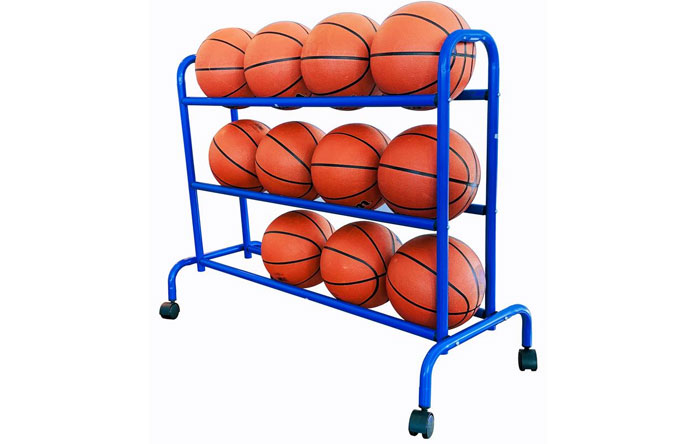
If you have an upcoming game or tournament, you’ll want some help nailing your free throw shots. Using a single ball will be incredibly inefficient — you’ll spend most of your time retrieving the ball rather than shooting it.
Gathering a pile of basketballs at your feet won’t work well either. You’ll have to bend down to pick them up, and they may present tripping hazards.
Luckily, a basketball rack can solve these issues. You’ll have a designated spot to keep all your balls as you practice, and you won’t have to rely on just one or two.
Basketball racks at sporting goods companies can be pretty pricey, as they can go for $100 or more.
Did you know you can make your own basketball rack DIY? Check out how to make a PVC pipe ball rack and save some serious bucks.
Materials for Your Basketball Rack DIY Project
You’re not in the mood to drop hundreds of dollars on a store-bought version of a basketball rack — we hear you.
Thankfully, you can build your own on a limited budget, as PVC pipe runs for around $1.00 per square foot. This price is already pretty low, but you can find even more affordable versions when you shop online. The other materials you’ll need (like caps and connectors) run for pennies.
Not only is building a PVC pipe ball rack affordable, but it also lets you implement your handyman skills along the way. Recruit your basketball buddies and make it a team effort, or enjoy the sense of accomplishment on your own.
As you start the construction process, you won’t even need high-end tools or materials. All you’ll need for your basketball back DIY project is:
- 1-inch internal diameter 40 PVC pipe
- (four) 2-inch 3-way elbow PVC connectors
- (four) 1-inch PVC caps
- (four) 1-inch PVC T-connectors
- (a handful of) 4-way PVC T-connectors
- PVC cutters (or a hand saw)
- PVC pipe glue
PVC couldn’t be a better material to implement into your basketball rack DIY project. It’s non-toxic and odorless so that it won’t leave lingering fumes in your gym.
Plus, it can withstand temperatures between 33°F and 140°F, meaning you can use it in a colder gym or the sweltering heat during an outside practice.
Some Words of Caution Before You Begin
Building a PVC pipe ball rack is pretty straightforward. You won’t be handling any heavy materials, and the work isn’t particularly hazardous.
However, we advise you to take some precautions before starting your basketball rack DIY project. The fumes from the PVC pipe glue can be dangerous to breathe.
And, if you get the substance in your eyes or on your skin, you may experience severe irritation.
Familiarize yourself with the product’s directions for safe use, and follow the instructions for treatment if necessary.
Another precaution to take before you begin your basketball rack DIY project is to become comfortable with whatever cutting tool you choose to use. There are several ways to cut PVC pipe, so determine which is best for you.
A PVC pipe cutter is the most ideal, as it’s specifically designed for this purpose. However, not everyone has access to this specialized tool.
Instead, you can use a hand saw or miter saw that you already have in your garage.
Making a PVC Pipe Ball Rack — Step-by-Step Instructions
After gathering your materials, you should be ready to start constructing your PVC pipe ball rack.
Instead of trying to figure out the specifics yourself, you can follow our tried-and-true method. It only takes five steps to complete:
Step 1: Make Your Cuts
Unfortunately, PVC pipes won’t come in the exact measurements you’ll need. But that’s okay.
By making your own cuts, you can account for the specific sizing that this project demands.
Pull out your cutting tool of choice and get to chopping. These are the quantities and dimensions you’ll need for your PVC pipe ball rack:
- Four pieces in 3-foot sections
- Four pieces in 1-foot sections
- Six pieces in 7-inch sections
- Four pieces in 6-inch sections
- Four pieces in 4-inch sections
To make an additional tier, you’ll need:
- Two pieces in 3-foot sections
- Four pieces in 12-inch sections
- Two pieces in 7-inch sections
Cutting PVC pipe isn’t like trying to cut diamonds. It should cut pretty easily, but you can apply a lubricant to the material before you begin.
Lubrication will minimize friction and let your blade glide without resistance. Plus, you’ll prevent particulates and dust from getting into the air.
Use a lubricant that’s safe for plastic, like one with a silicone base or a food-grade rating.
Step 2: Form Your First Straight Line
Begin with a T-connector in your hand. Connect a 6-inch piece and a 7-inch piece to it, then attach another T-connector and a 6-inch piece to the first T-connector.
Attach 4-inch sections to all the leftover openings. Finish off step #2 by placing caps on the 6-inch pieces’ ends.
At this point, you should have a 6-7-6 pipe sequence that creates a straight line.
Step 3: Add Four-Way Connectors
Take a 4-way connector and attach it to both of the 4-inch pipes. Connect each 4-way connector with one of your 7-inch sections. Then, attach a 12-inch section to each side; they should be parallel with the 4-inch connection.
At this point, your PVC pipe ball rack should look like a track hurdle. It’s not functional quite yet, but the shape is getting there.

Step 4: Introduce Your Three-Way Connectors
Cap off both of your 12-inch pieces with a 3-way connector. Use this 3-way connector to place a 7-inch section in between them. Ensure that the connectors’ open parts are facing the same way.
Now, you can glue all of the joints. Give your creation enough time to dry to ensure you won’t have to fix it later on.
Use the drying process to create a second panel for the other side of your PVC pipe ball rack. You can also build a couple of extra tiers if you desire.
Step 5: Perform the Final Touches
Use a one-foot pipe to connect each pair of the open connections and glue down the joints. The final product will be a tiered PVC pipe ball rack that’s ready for use!
Tips for Your Basketball Rack DIY Project
As you can see from the step-by-step instructions, building our own PVC pipe ball rack is simple enough. We’d like to let you on two tips that’ll make it even easier:
Use 4-way connectors to create more room: You can get away with using 3-way connectors, but you won’t be able to create an extra tier like you would with 4-way connectors.
So, invest in 4-way connectors, and you can make your PVC pipe ball rack have up to four tiers. One extra tier will offer more space for your basketballs, but it won’t cause a toppling risk.

Account for your balls’ diameters: A standard NBA ball is about 9.5 inches in diameter. So, you must make your PVC pipe ball rack have a depth of 8 inches to make enough space.
With these numbers in mind, each tier should be able to hold three or four balls.
Conclusion — Building a PVC Pipe Ball Rack
Even if you always leave handiwork around the house to the experts, you’re more than capable of building a long-lasting PVC pipe ball rack. It involves minimal manual labor and cheap materials that are easy to come by.
When you set aside a half-hour (or an hour at the most) of your weekend and put your mind to the task, you’ll create a practical product for your gym.
All your teammates will be dying to know where you got it, and it’s up to you if you want to disclose its point of origin.
If you prefer to save the hassle, here are some of the best basketball storage racks we have reviewed.
